
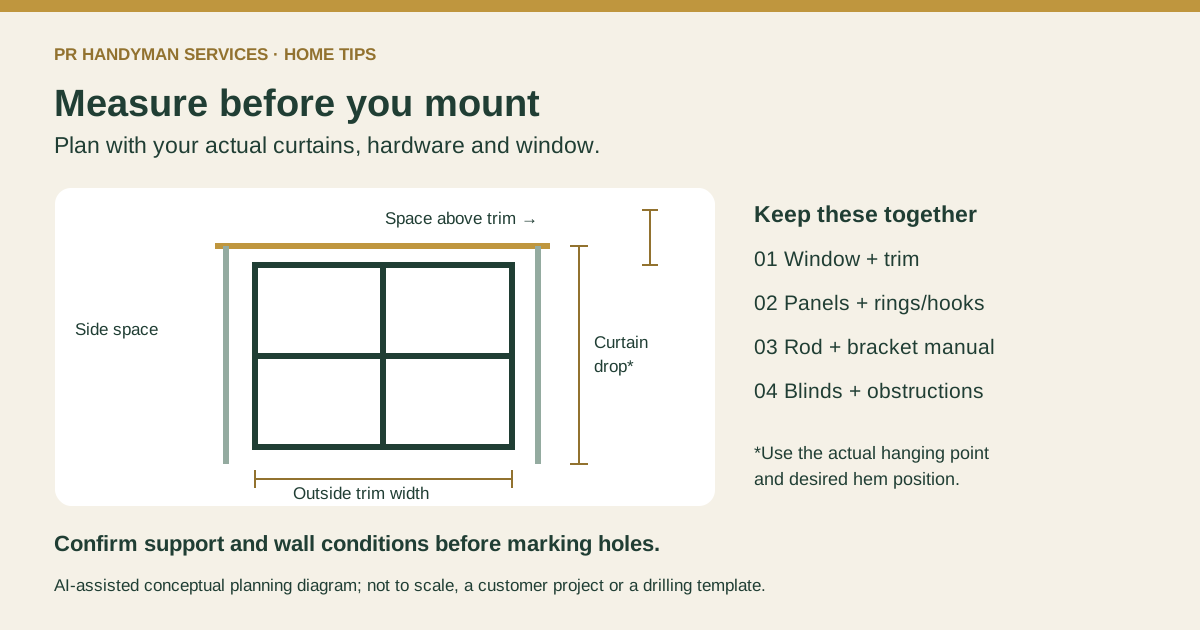
Before choosing a curtain rod position, record the window and outside trim width, the space above and beside the trim, the curtain panels and their heading hardware, and anything that could block the curtains. Use those details with the exact rod and curtain instructions before marking holes. There is no single rod height, side extension or bracket spacing that fits every window.
1. Measure the window and trim
Write down the width across the outside edges of the trim. Note the room available on each side for the open curtains, rod ends and brackets. Photograph the whole wall so a close corner or adjacent opening is visible. Measure only from a stable position you can safely reach; disclose high or difficult access rather than stretching to obtain a number.
IKEA's curtain-planning guide considers window coverage and space for curtains to open. Its example side allowances belong to that guide; use your actual panels, hardware and available wall space instead of treating them as a universal rule.
2. Work from the actual curtains
Record the panel length and heading type: rod pocket, grommets, rings, clips or hooks. Decide where you want the hem to finish, then check the distance from that desired hem position to the actual hanging point. Rings or hooks change that relationship. Include their dimensions rather than assuming the top edge of the fabric sits on the rod.
Record the space above the trim and any ceiling or molding limits. Choose the rod position and curtain drop together before buying a fixed-length panel or marking a bracket. The diagram labels planning inputs, not recommended installation dimensions.
3. Check the whole path
- Space for curtains to stack when open on both sides
- Rod ends and brackets near corners or adjacent windows
- Projection past trim, handles, a sill or existing blinds
- Doors and furniture that could catch the fabric
- Heaters or other equipment with their own required clearances
Use the equipment manufacturer's clearance requirements where relevant. Do not assume a curtain can safely cover a heater. A wide photograph and a close-up of the obstruction are useful; keep unrelated personal details out of shared images.
4. Check the exact rod and wall requirements
Keep the rod model, adjustment range, bracket instructions and curtain weight together. Manufacturer support requirements can depend on the span and load. For example, the current IKEA RÄCKA 47–83 inch product page gives bracket requirements and load conditions for that specific rod. Do not transfer them to a different rod.
The BETYDLIG bracket guidance also says fasteners must suit the wall or ceiling material. Measurements do not establish the wall construction or a suitable fixing. Existing holes do not prove the new hardware is compatible. Have uncertain support or mounting conditions assessed before installation.
5. Send a useful installation request
For curtain-rod installation help in Raleigh or the Triangle, send PR Handyman Services the rod and curtain links or models, panel/heading details, window count, safe measurements and photos of the wall and obstructions. Mention existing hardware, difficult access and any required property-owner permission. These details support a scope review; they do not confirm an appointment, price or installation method.
Use our estimate-photo guide to prepare the photos, then request an estimate. Share project photos privately. Keep any unknown measurements clearly marked unknown.